
It feels a bit scary putting into words that the engine is now, finally, fixed but I promised you a blog when it was done and, at the end of the day, as this is a boat all I can really say is that the engine is fixed – for now!
But she is looking fairly good…….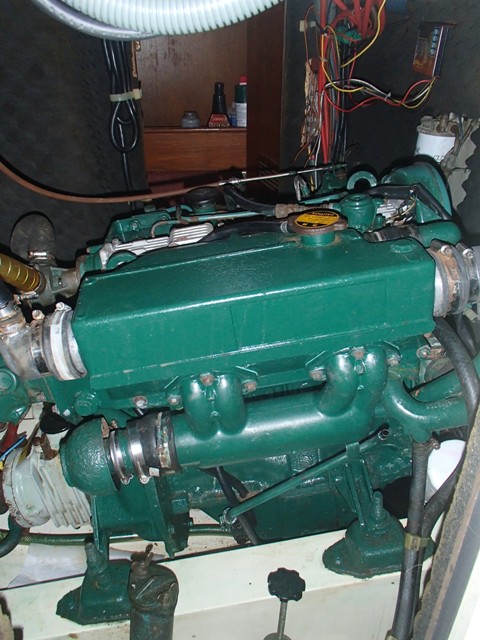
You will probably remember that our engine saga started back in June when we had to replace the water pump. This was followed about a week later when we completely cleaned the heat exchanger and then had to haul out to replace a split hose which necessitated the removal of the prop shaft. [If you missed out on all of this excitement you can read about it in “Those dratted engine problems” posted in October 2014].
Anyway, we “splashed” [i.e. came back into the water] on 14th October and obviously ran the engine for the first time since being hauled out in August only to find our coolant was once again “disappearing”. There was no sign of it in the engine compartment – so water pump still OK, no sign of it in the seawater/exhaust system – so heat exchanger OK. Only one thing left – and, yes, we had green oil!!!! This meant the cylinder head gasket [at best] and the whole engine head and block [at worst – well probably there is something worse but at the time it didn´t bear thinking about].
To assess the problem we had to get the cylinder head off, which is quite easy to say, but not quite so easy to do. To start we had to take off three of the four pulleys we had removed when doing the water pump and it went on….and on…and on from there. Fuel system, seawater pump etc etc. There were actually 29 different stages and a couple of those had “component parts”. I know I am at risk of being considered anal retentive but I listed the stages, with the sections and page numbers from the Volvo Penta workshop manual. It was certainly very handy for putting it back together again because we could more or less just reverse the process. All engines are no doubt different but, if anyone is interested I have copied the document at the end of this post.
We also had a “small parts box” [as I am sure most mechanics do]….
 ….into which went all the screws and bolts and bits and pieces – every one of them labelled. We also took photographs of the wiring and the way things were arranged before we took bits off. Whilst I won´t even think about boring you with them – again, they really helped when we came to put it back together.
So, we finally separated the head and the block – no mean feat as it turned out. This engine is 21 years old and most of it hasn´t been touched – well hey, if it´s working don´t mess with it!! Anyway several of the bolts were stuck and we broke three “normal” sockets trying to get them off. In the end we borrowed an impact socket from the resident mechanic and with some huffing and puffing on Mike´s part off they came. Impact sockets are now on our list of things to buy when we come back to the UK. [Malc and Steve – if you haven´t got some then you can start your Xmas list early!]
I guess we saw what we expected to see but it still looked like a big Oops!—-
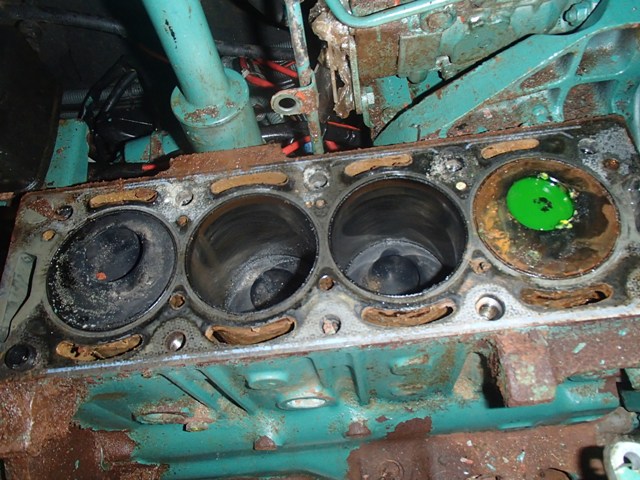 We weren´t quite sure of the significance of the coolant being in only one of the four cylinders but we remained hopeful. The gasket actually looked fine – a bit old maybe, but no obvious splits.
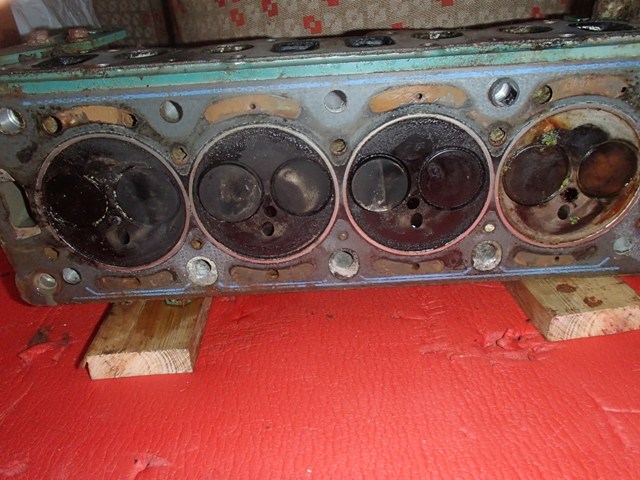 So, it wasn´t until we took the gasket off that we found the cause – the same “worm holes” in the head as we had had in the water pump. Another result of us not using coolant. There were only two holes immediately visible and they weren´t very big – but who knows what was really going on inside? We decided that getting a head of this age, and in who knows what condition beneath the surface, skimmed would be a waste of time and money so we sourced a replacement on the Internet.
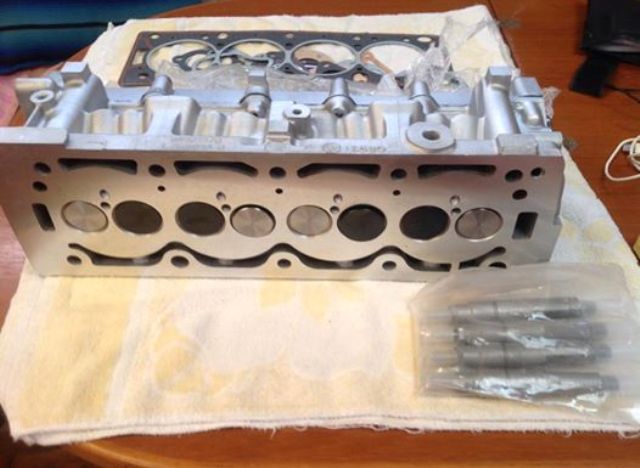 As you can see it is certainly much prettier than the one we took off, came with the camshaft and valves all set up and with new injectors and plugs. It is just a shame that it took 2 months from ordering it to its arrival!
Still, we kept ourselves busy. We did all the usual regular servicing of things like winches, outboard, wind generator, we turned the anchor chain and we also tackled another problem we had been having – a leaky hot water heater which had a small hole which needed braising.
To get at the water heater we had to remove the battery box [of course – no job can be done without the whole boat coming apart!]. But, maybe this wasn´t such a bad thing. We have been considering a bigger battery bank and since the box was now out from under the bed, we had the idea of increasing its size so that when we get round to changing the batteries we have more options. We worked out that we could make the box 1” longer and 4” wider and still fit it under the bed [tight squeeze but possible]. This extension will allow us to increase the domestic battery bank from approx 170 amp hours to 520 amp hours. Not bad eh!
Having sliced it up we put greaseproof paper in the gaps before screwing on wood “splints”.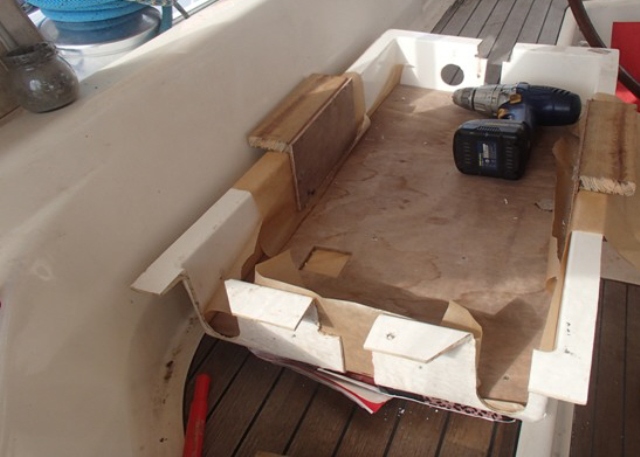 We had read that greaseproof paper meant that the epoxy wouldn´t stick to the splints and could be easily removed afterwards. Not so sure about the easily removed – but the box doesn´t look bad after Mike´s first attempt at epoxying.
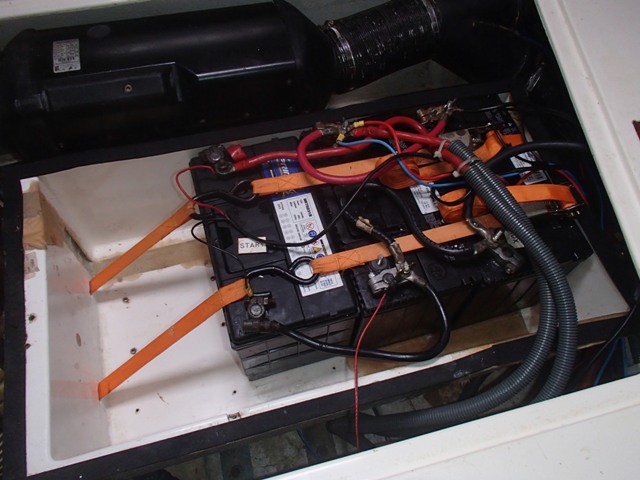
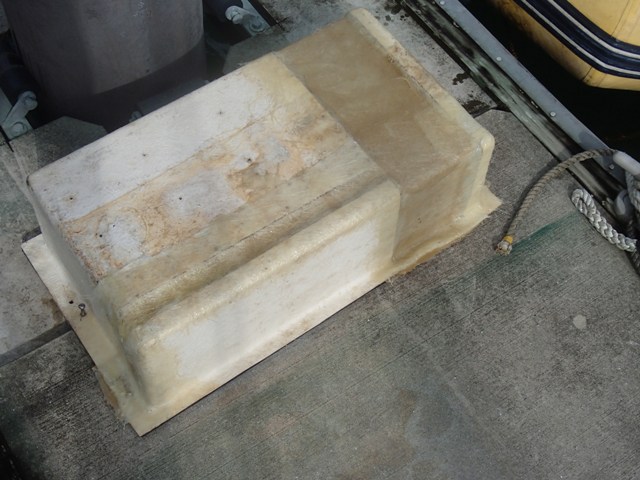 Having extended the box, the original metal brace which held the batteries in place no longer fit but we had the idea of using ratchet straps instead. Mike was quite pleased with our brainwave and thinks that this system is much more secure.
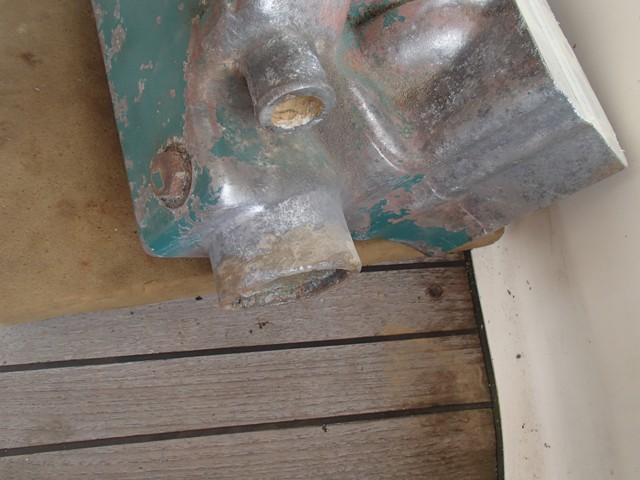
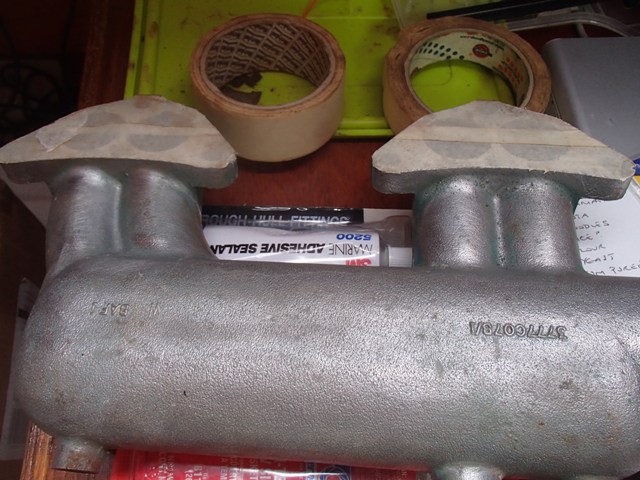
 Mike also prepared the engine parts we were putting back. He removed all the rust….
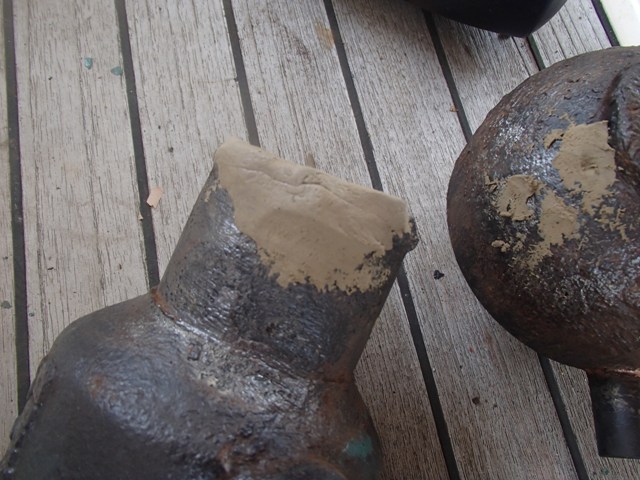
 ….used increased temperature epoxy putty to smooth out a few rough ends and block a couple of small holes in the air intake cover
…primed everything….
 ….and then gave them two topcoats of Volvo Green.
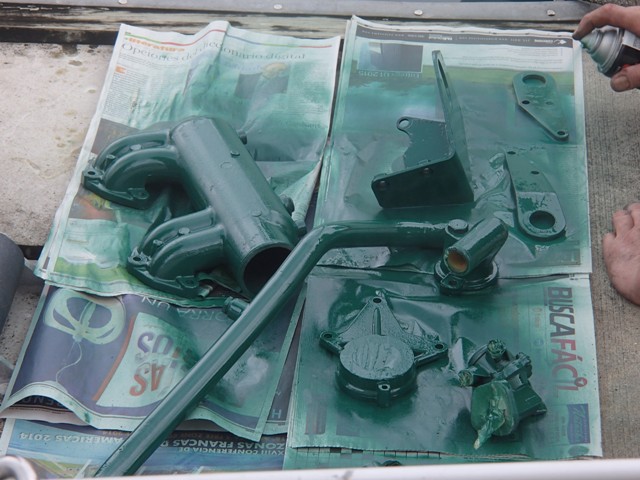 Someone suggested that engines should be painted white or cream so that you can see oil drips etc. A Penta just wouldn´t look right if it was white!
Finally, on December 18th the new head arrived. We were then told by a “Kiwi” we had spoken to that before putting the head back on, the top of the top of the block had to be as shiny as new. Obviously we hadn´t left it in the state we found it when the head came off but there was a half day spent with fine sandpaper and a polishing rag before we could proceed further.
We got it approximately two thirds back together before taking a break on a friend´s yacht in Portobelo for Xmas and then completed it on our return. Well, almost!!!!! The exhaust elbow and the small connector pipe attached to it had, as reported above, been cleaned and painted and had been sitting under the saloon table – well where else do you keep engine parts! It all seemed to go together OK but when we turned on the engine we had a small leak there. Mike tightened the hose clips and the end of the pipe just crumbled. We have ordered both connector and elbow which is being delivered to us [thanks John Byrne] in about 11 days time. In the meanwhile, as Mike has now made friends with just about every paint shop, welder and fabricator in Colon we have had the pipe welded. It is a really good job but as we don´t know what it was [corrosion?] which caused the collapse we have opted for replacements which we intend to fit when we get to the Pacific.
Since completing the job we have been out for a short sea trial and we have run the engine on the dock, in gear, for a total of approx 10 hours. All coolant/seawater/oil seems to be staying where it is supposed to. During the testing period we have changed the oil and oil filter and the coolant twice. We have also changed the transmission oil in the gearbox because when Mike degreased the whole engine [forgot to tell you about that bit of preparation] he “power washed” it with the hosepipe and there was a small split in the filler gasket on the gear box so we think water got in. This has now been replaced.
So, as far as we can tell, we are good to go. It will be nerve racking because going through the canal is NOT the time to break down. But we feel we have done all we can. So, good friends, please keep your fingers crossed for us on 27/28 January.
This isn´t quite my last reporting from the Atlantic as there have been some non-work days and we have made some good friends and had enjoyable evenings chewing the cud. We have also done a third transit as line handlers [a week ago] and are due to go again on Thursday and Friday of this week – all of which needs to be recorded on the blog
So, finally – as promised – since I couldn´t make a link or insert a document [probably my incompetence] I have copied my list for removing the cylinder head:
Removal of cylinder head – Volvo Penta MD22L
| Manual Section | Page | ||||
| 1 | Drain coolant | 20A-01 | 97 | ||
| 2 | Drain sea water | 20A-03 | 99 | ||
| 3 | Remove cap of timing cover | 15A-01 | |||
| 4 | Remove alternator | 22A-01 | 119 | ||
| 5 | Remove water pump pulley | 20A-05 | 101 | ||
| 6 | Remove camshaft pulley | 15A-06 | 63 | ||
| 7 | Remove exhaust elbow | ||||
| 8 | Remove crank case to exchanger bar | ||||
| 9 | Remove seawater return gauge | ||||
| 10 | Remove wiring [G –left, B –right, Bl/W front middle] | ||||
| 11 | Release hot water pipes | ||||
| 12 | Remove water flange | ||||
| 13 | Remove intake manifold – NB Oil breather | 20A-10 | 109 | ||
| 14 | Remove heat exchanger | 20A-10 | 109 | ||
| 15 | Remove fuel pump | 19A-06 | 91 | ||
| 16 | Remove fuel pump filter | ||||
| 17 | Remove fuel pipes | ||||
| 18 | Remove sea water pump [Reconditioning 20A-07 p….] | 20A-06 | 102 | ||
| 19 | Remove fuel pump bracket | ||||
| 20 | Remove injectors | 19A-02 | 87 | ||
| 21 | Remove glow plugs | 22C-01 | 122 | ||
| 22 | Put screws in fuel pulley | ||||
| 23 | Remove timing belt | i | Tensioning pulley | 15A-03 | 58 |
| ii | Idling pulley | 15A-04 | 60 | ||
| iii | Timing belt | 15A-03/04 | 58/60 | ||
| iv | Cam pulley | 15A-06 | 63 | ||
| 24 | Undo two screws from timing belt cover | ||||
| 25 | Remove hose between thermostat and water pump | ||||
| 26 | Remove cylinder head plate and screws | ||||
| 27 | Remove cylinder head bolts | 12A-07 | 26 | ||
| 28 | Replace cylinder head plate and screws on head | ||||
| 29 | Remove dipstick screw | ||||
1 comments
THE best blog post of all time! seriously, congratulations, there is some work in the paragraphs above. suggest you take off into the pacific now for a rest!